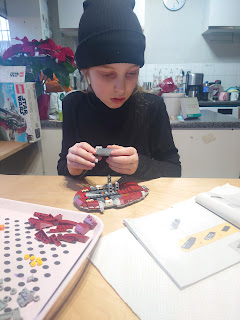
My Sunday photo 25/02/2024


So nice to have some sunshine for once to go for a walk! 

How to make homemade playdoh.

Hey readers, 

Playdough is a classic childhood favourite. It's a versatile, squishy, and colourful material that can provide hours of creative fun for kids (and adults!) of all ages.

How to make homemade playdoh.

The best part is that you can make your very own playdough right at home. In this blog post, we'll walk you through a simple and fun DIY playdough recipe that you can whip up in no time.

Ingredients You'll Need.

* 2 cups of all-purpose flour.

3/4 cup of salt.

* 4 teaspoons of cream of tartar.

* 2 cups of water.

* 2 tablespoons of vegetable oil.

* Food colouring (choose your favourite colours).

A medium-sized saucepan.

* A mixing spoon.

* A stovetop.

Method.

1. Mixing the dry ingredients.

Begin by mixing the flour, salt, and cream of tartar in a medium-sized saucepan. Make sure you have a sturdy, heat-resistant spoon for this task.

2. Adding wet ingredients.

After the dry ingredients are well mixed, add the water and vegetable oil to the saucepan. Stir everything together until it forms a smooth, lump-free mixture.

3. Cooking the dough.

Place the saucepan on the stovetop over low-medium heat. Continue to stir the mixture constantly. The dough will start to thicken and pull away from the sides of the pan. This process typically takes 2-3 minutes.

4. Colouring your playdough.

Once the dough has come together, remove it from the heat and allow it to cool slightly. Now is the time to add some vibrant colours!

 Create a small well in the centre of your dough and add a few drops of food colouring.

 Fold and knead the dough until the colour is evenly distributed. Keep in mind that food colouring can be quite potent, so start with a few drops and add more if needed.

5. Store and play.

Allow your homemade playdough to cool completely before storing it in airtight containers or plastic bags. Make sure it's tightly sealed to keep the playdough fresh.

Congratulations! You've just created your very own batch of homemade playdough. 

Not only is it a cost-effective alternative to store-bought playdough, but it's also an engaging DIY project to do with your children.

Tips and Tricks.

If your playdough feels too sticky, you can knead in a bit more flour. Conversely, if it's too dry, add a small amount of water.

 Experiment with different colours and even add some glitter for extra sparkle.

To keep your playdough fresh, store it in an airtight container or zip-lock bag. It can last for several weeks if properly stored.

Playdough can be a fun tool for sensory play. Consider adding items like buttons, beads, or small toys to enhance the tactile experience.

 This DIY playdough recipe is non-toxic and safe for children, but always supervise young children during playtime.

Whether you're a parent looking for a creative activity to keep your kids engaged or an adult seeking a stress-relieving hobby, making homemade playdough is a delightful project that offers endless possibilities for imaginative play.

So, roll up your sleeves, get creative with colours, and enjoy the squishy, mouldable world of homemade playdough!

Cheers for reading X

What to expect when going for cervical screening.

Hey readers, 

Entering the realm of cervical screenings can be a mix of anticipation and uncertainty for many women in the UK.

What to expect when going for cervical screening.

As a crucial aspect of preventive healthcare, these screenings, often referred to as smear tests, play a pivotal role in the early detection of cervical abnormalities.

 If you're gearing up for your first cervical screening or just curious about the process, here's a glimpse into what you can expect.

1. The Invitation.

It typically starts with a letter from your local National Health Service (NHS) inviting you for a cervical screening. 

The letter includes essential details such as the purpose of the test, the venue, and how to schedule your appointment.

 It's a proactive step towards ensuring women's health, emphasizing the importance of regular screenings.

2. Scheduling the Appointment.

Upon receiving the invitation, it's time to schedule your appointment. Most screenings are conducted at your GP's surgery or a local sexual health clinic.

 Be sure to choose a date and time that suits your schedule, as this ensures you're in a calm and comfortable mindset for the procedure.

3. The Screening Process.

When the day arrives, a trained healthcare professional, often a nurse, will guide you through the process. 

The screening involves taking a small sample of cells from the cervix using a soft brush. 

While it might be momentarily uncomfortable, the procedure is quick and generally painless. 

Communicate any concerns or anxieties with the healthcare provider to make the experience more manageable.

4. Confidentiality and Privacy.

Rest assured, your privacy is a top priority during cervical screenings. 

The healthcare professional will ensure you're comfortable and adequately covered throughout the process. 

They are well-trained to maintain confidentiality, fostering an environment where you feel secure discussing your health.

5. Results and Follow-up.

After the screening, the collected sample is sent to a laboratory for analysis. 

It usually takes a few weeks to receive the results. The letter you receive will clearly explain the findings. 

Most screenings come back normal, offering reassurance. If abnormalities are detected, don't panic it doesn't necessarily indicate cancer.

 Further tests or treatments may be recommended based on the severity of the findings.

6. Emotional Support.

It's normal to feel a range of emotions during and after the screening process. 

If you have concerns or questions, don't hesitate to reach out to your healthcare provider.

 Emotional support is an integral part of the screening journey, and professionals are there to address your needs and provide guidance.

7. Regular Screenings.

Cervical screenings are generally recommended every three to five years, depending on your age and previous results.

 Consistency in attending screenings is crucial for early detection and effective prevention.

In conclusion, undergoing a cervical screening in the UK is a vital step towards maintaining your reproductive health.

 By understanding the process and embracing the regular screenings, you empower yourself with knowledge and contribute to the proactive care of your well-being. 

Remember, you're not alone – the healthcare professionals are there to guide you every step of the way.

Cheers for reading X 

My Sunday photo 18/02/2024


My Sunday photo 18/02/2024

How to Donate to Your Local Food Bank: 10 Tips for Making the Biggest Impact

Hey readers, 

Food banks provide crucial resources for millions of people facing hunger. 

But they rely entirely on donations and can’t achieve their missions alone. 

How to Donate to Your Local Food Bank: 10 Tips for Making the Biggest Impact

Support from compassionate community members allows food banks and pantries to serve more families in need. 

If you’re interested in contributing through food or monetary donations, put your gifts to the best possible use. 

Follow these 10 tips when giving to food banks to make the biggest difference.

1. Find Your Local Food Banks. 
 
Not sure where to donate or how to get involved? Your first step is locating food banks and pantries in your region.

 Search online databases for those nearby then visit their sites to learn about current needs and programs

. Tracking which items are most useful allows you to cater donations and volunteer to fill their gaps. 

2. Give What They Need
Food banks can struggle.
 
distributing or storing donations that are near expiring or hard to utilise. 

Check requested items before shopping or holding a food drive. Shelf-stable proteins, whole grains and produce are hugely helpful. 

Remember essentials like nappies, toiletries and laundry items too. Giving the most useful goods makes your contribution go further.  

3. Pay Attention to Nutrition. 

While all donations are welcome, focus on nutritious items when possible.

 Canned fruits and veggies, whole grains and high-protein options provide good nourishment. 

Treats are nice occasionally but sufficient nutrients are what struggling individuals and families rely on food banks for the long term.  

4. Avoid Opened or Expired Items. 

Though your impulse to clean out old food comes from a kind place, most pantries legally can’t distribute anything opened or expired.

 This creates more work removing unwanted items. Double-check dates and ensure anything unsealed gets thrown out first. 

Protecting the health of recipients has to come before clearing your shelves.
 
5. Organise a Food Drive. 

Hosting a food drive through your company, place of worship or community group makes raising awareness and collecting donations easy.

 Set goal amounts then track contributions and report impacts. Make it a friendly competition then celebrate successes.

 This shows the collective difference small efforts make when combined.
  
6. Give Financially If Possible. 

Unless you can organise large-scale food donations, monetary contributions may provide the most value. 

Funding allows food banks to purchase exactly what they need and cover vital operating expenses besides just food distribution. 

Even small recurring monthly gifts build stable budgeting foundations. 
 
7. Use Online Fundraising Tools. 

If individual finances are tight, turn to collective community generosity. 

Facebook lets you easily create fundraisers where your friends and followers contribute to causes you select.

 Encourage friendly challengers then track who raises the most. 

Again, update continually then share final pound amounts and what programs it assisted. 

8. Volunteer Your Time. 

Besides goods and money, pantries need helping hands sorting stock, packing family bags, assisting distributions and more. 

Build community connections while directly enabling their operations to run smoothly. 

Be reliable with shifts to maximise your positive influence.
  
9. Offer Your Special Skills. 

Along with manual tasks, food banks need talented volunteers too. 

Share professional abilities where possible graphic design, photography for marketing materials or social media for instance. 

Nonprofits rarely have full creative teams so assisting spreads content and stories to much wider audiences.  

10. Advocate to Decision Makers. 

Lastly and crucially, use your voice on behalf of food banks to enact policy-level changes. Call local representatives explaining the struggles families face and the need for institutional backing. 

Attend council meetings and budget hearings then speak up loudly for those who can’t. Share resources and address misconceptions so leaders better understand food insecurity challenges in your community. 

Progress starts with brave advocates. 

Donating to meet urgent hunger needs also means pushing society to make long-term reforms so food banks serve as a last resort rather than a sole survival means.

 With your help in supplying goods and guidance, together we can build communities where everyone gets fed while addressing root inequities.

 Support your regional food banks through donating, fundraising, volunteering and advocating today!

Cheers for reading x

Mastering the art of blogging!


Hey readers, 

In the fast-paced world of blogging, consistency is key. Whether you're a seasoned blogger or just starting, managing a blogging schedule is crucial for success.

Mastering the art of blogging!

 Juggling content creation, promotion, and engagement can be overwhelming, but with a well-organised schedule, you can stay on track and build a thriving online presence.

In this blog post, I'll share some practical tips and strategies to help you master the art of blogging schedule management.

1. Set Clear Goals.

Before diving into the nitty-gritty of scheduling, it's essential to define your blogging goals. What do you want to achieve with your blog? 

Whether it's growing your audience, increasing engagement, or monetising your content, having clear goals will guide your schedule and help you prioritise tasks.

Consider breaking down your goals into short-term and long-term objectives. Short-term goals could include weekly or monthly targets for blog posts, social media updates, or email newsletters.

 Long-term goals may involve reaching a specific follower count, launching a product, or collaborating with other bloggers.

2. Create a Content Calendar.

A content calendar is the backbone of an effective blogging schedule. It allows you to plan and organise your content in advance, ensuring a consistent flow of posts.

 Start by outlining a monthly calendar and populate it with your blog post ideas, social media updates, and any other relevant tasks.

Consider using tools like Google Calendar, Trello, or CoSchedule to manage your content calendar. 

These tools often provide collaborative features, making it easy to coordinate with a team or keep track of individual tasks. 

Allocate specific days for different types of content, such as blog posts, social media updates, and email newsletters.

3. Know Your Audience.

Understanding your audience is crucial for creating content that resonates with them.

 Use analytics tools to gather insights into your audience demographics, interests, and online behaviour. 

By knowing your audience, you can tailor your content to meet their needs and preferences.

Consider creating audience personas to represent different segments of your target audience.

This will help you craft content that appeals to specific groups, ensuring a more personalised and engaging experience for your readers.

4. Batch Content Creation.

One of the most effective time-management strategies for bloggers is batching content creation.

 Instead of writing one blog post at a time, dedicate specific days or blocks of time to create multiple pieces of content in one go. 

This allows you to focus on a single task, minimising distractions and increasing overall productivity.

Start by outlining several blog post ideas and then move on to the writing phase.

 Batching not only streamlines the content creation process but also provides a buffer of scheduled posts in case unexpected challenges arise.

5. Be Realistic with Frequency.

While consistency is vital, it's equally important to be realistic about your blogging frequency. 

Assess your available time, energy, and resources to determine how often you can realistically publish new content.

 It's better to commit to a manageable schedule and stick to it than to overcommit and struggle to meet unrealistic expectations.

If you're just starting, consider a bi-weekly or monthly posting schedule and gradually increase frequency as you become more comfortable with your workflow. Quality should always take precedence over quantity.

6. Leverage Automation Tools.

Save time and streamline your blogging tasks by incorporating automation tools into your workflow

 Social media scheduling tools like Buffer, Hootsuite, or Later can help you plan and schedule your posts in advance, ensuring a consistent online presence without the need for manual updates.

Additionally, consider using email marketing platforms like Mailchimp or ConvertKit to automate your newsletter distribution.

 Automation tools can handle routine tasks, freeing up more of your time for content creation and engagement with your audience.

7. Prioritise Engagement.

Blogging isn't just about creating content; it's also about building a community.

 Allocate time in your schedule for engaging with your audience through comments, social media, and other interactive channels.

 Responding to comments, participating in discussions, and acknowledging your audience's input fosters a sense of connection and loyalty.

Set aside specific blocks of time each day or week for engagement activities. 

This not only strengthens your relationship with your audience but also helps you stay attuned to their preferences and feedback.

8. Learn to Delegate.

If your blog has grown to the point where managing everything becomes overwhelming, it might be time to delegate tasks. 

Whether it's hiring freelancers for content creation, a virtual assistant for administrative tasks, or a social media manager for online promotion, delegating responsibilities can help you focus on your strengths and core aspects of blogging.

Clearly define roles and responsibilities, and communicate effectively with your team to maintain a cohesive workflow. 

Delegating allows you to scale your blog and take it to new heights without being bogged down by every detail.

Mastering the art of blogging schedule management is a journey that requires planning, flexibility, and a commitment to continuous improvement. 

By setting clear goals, creating a content calendar, understanding your audience, and leveraging automation tools, you can streamline your workflow and achieve consistency in your blogging efforts.

Remember that blogging is not just about producing content but also about building a community and fostering meaningful connections with your audience. 

Stay true to your goals, be realistic with your commitments, and enjoy the process of creating valuable content for your readers. 

With a well-managed blogging schedule, you'll be on your way to success in the dynamic and ever-evolving world of blogging.

Cheers for reading X 

My Sunday photo 11/02/2024

My Sunday photo 11/02/2024

My eldest son said he is emo today, well he has the sulkiness so we are halfway there 😂